Saturday, May 25, 2013

9 in 5 by 23: Photos and Books

Hello friends!

It's been a couple weeks since my last post... but I promise that I've been keeping busy and thinking of you the whole time! :)

I have been working away to close out some of those items on my 9 in 5 by 23 list, which I had started but just recently finished! Numbers 3 and 5 have been completed!

First, #3. Go through and organize all of my old 35mm prints.
When I was younger, I had a Samsung point-and-shoot 35mm camera that my grandpa gave me as a birthday gift. I took that thing everywhere with me as long as it contained film. I used it from the time I got it (I think it was for my 7th birthday) until partway through my sophomore year of high school. And it still works, to this day! I love that camera.

I only had a few albums and they were small, so I kept many of my photos in shoe boxes. One day, my dad got a new pair of CAT work boots and when I saw the box, I knew I could fit all of my photos in there! And so I did. Here's the box! The date on the front signified the last time I opened it to see what was inside, haha.


Pretty legit, huh? 

I had a great time sifting through these old memories. I also went through the three randomly organized photo albums I had filled through the years and stripped them of all their photos (ruining a couple cheap-o albums in the process). Finally I had all of my photos out where I could see them (read, "... where I could seem them and see nothing else in my room"). 

I painstakingly sought out to figure out the month and year each photo was taken so that I could fill a new photo album with a consolidated number of photos in chronological order. It was a tedious process... O.o 
BUT when I was done, I was thrilled with the results. 


I bought this photo album on Amazon after researching for a few days, looking for a well reviewed, highly rated album that was reviewed as durable and attractive. I actually really, really like this photo album. It is made of durable material, and it has a simple and chic look, all for a reasonable price. Also it holds 500 (that's right,five hundred!) 4x6 photos, showing 10 photos in a two-page spread (5 photos a page), with landscape and portrait openings. I did cheat in a few places and used photo safe tape to tape some larger than 4x6 photos in, but those photos actually look good in with the rest! 


I am relieved to be done with this task and thrilled with the results. I almost filled the whole album; it holds 500 photos and I have 13 slots left. 

One day I also hope to digitize all of my 35mm prints to preserve them in case of a house fire, flood, etc. THAT I might have to hire out. Haha!

Next, #5. Go through the books in the garage: donate vs. keep.
When I moved back in with my parents last summer, my bookcase was a mess. They had moved it from my old room into the "guest" room and in order to move it, had removed all the books. They then put them all back in random order (random to me, at least) when it was relocated. That wasn't the only problem with it though. I had left it at home without a second thought after high school. Needless to say by the time I returned to it from college, 4 years later, many of the things in the bookcase I no longer needed/wanted. So I tossed a lot of random school papers, news clippings, magazines, etc. I also "boxed" up a bunch of old chapter books, etc. to keep in the garage. I put quotes on "boxed" because I used an old garbage can to "box" my books. 


Today was a warm day, so I thought it would be a good day to check this item off of my list. 


I found out that a lot of the bulk of this pile was made up of college notebooks and binders and a pile of Dog Fancy magazines from when I held a subscription waayyyy back. All of that was recycled. 

There were a few gems that I found and kept, though. For example some of my old children's books that I read and had read for me, when I was learning to read. I also read these books to my sister when she was learning to read. 

I'm going to keep these, in hopes they'll make it to another bedtime story time one day. :)


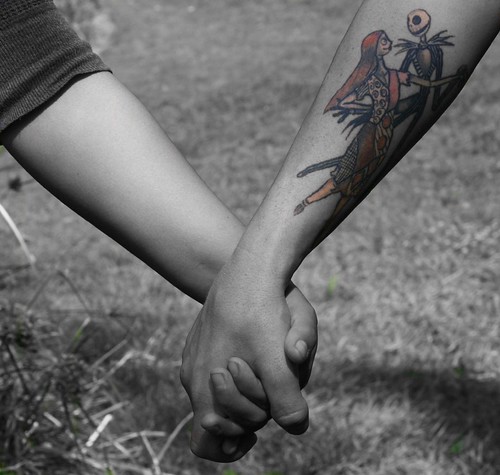
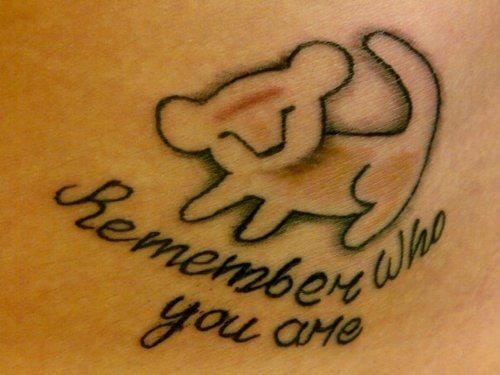
Also found a stack of binders that I had kept my old "art" in. Here's some fan art that I drew way back, that made me smile today when I dug it up.


A nerd then, now, and forever, for sure!! 

In the end, much of the volume in that garbage can was recycled but there was a good handful of books that I thought were fit for donation. I had the first three of the Twilight saga and the first two of the Narnia series in paperback, and a random assortment of 3 generations of Nancy Drew books. I kept one really old copy of The Mystery at the Ski Jump as the only Nancy Drew book left in my personal collection. 


All in all the book endeavor was much easier than the photo endeavor, but it was also satisfying. It's good to get rid of some of that bulk, especially since another move is close in my future. Slowly but surely I'll shed some clutter and this is one step toward that! 

So that's two more down on my 9 in 5 by 23 list! I can't wait to knock some more out! 

Hope that you're getting some of those things that you've been meaning to do, done! 

Until next time, stay excellent! 
- Jenny - 

Saturday, May 11, 2013

9 in 5 by 23: Wild @ Art

Hello friends!

I am sorry that I have been absent for a while. We've been busy bees getting Mr. Kyle all graduated from university and moved from his apartment. It has been a busy busy couple of weeks! But fear not, I have not forgotten you!

In fact, I have been trying to keep in mind my 9 in 5 by 23 list! I have been working away at these.

This past week, Kyle and I were able to go to a small, privately owned and operated ceramic painting studio in Moscow, ID, Wild @ Art. It was a lot of fun! :D Kyle and I spent a good few hours painting away on a couple of tall mugs.


It was so fun!  It was a beautiful day and we a had a great time being creative and laughing at one another's silly slip-ups in painting.

Something that's really exciting about painting the unfinished ceramic and leaving it to be glazed and fired is seeing the results in the end! I love it! The paint dries pastel-y and it's hard to picture how the colors will look until you get the final piece, when you pick it up!


Kyle painted his mug a mixture of white "Cottontail" and a blue "Blue Yonder." Then he painted "#1 MOM" and "Happy Birthday, Happy Day of Mother" since the two occasions fall so close to one another. :D

My background color on my mug was a gray called "Silver Lining" and I used all sorts of colors for the dots.
Here's what it looked like all finished, when we picked it up a week later!


Awesomeness!!
So that's one of the nine items on my list. But I've got a few others that are in progress and one that is complete! I'll tell ya about that one next time, friends!

Until then, stay excellent!

- Jenny -

Friday, April 26, 2013

Update: Microterrariums

Hey, friends!

Do you guys remember my microterrariums from way back when??
Well, with spring making its appearance here in the arid desert of Eastern Washington, I was reminiscing on plants of past and I realized I never did let you guys know how those turned out!

So here's that long overdue update!

Here's what the plants looked soon after I started them. Happy and warm on my sunny window sill!
April of 2012, so one year ago, I saw some cute little sprouts!!


And below are some closeups of my brain plant seedlings.


And here are the butterfly bushes. As you can see, I planted a few too many. :P


In May, I moved from Pullman and brought my plants with me.
Just before I moved, I replanted the seedlings in bigger pots.

The new home for my brain plants, last May (2012).

Transplanted and happy brain plant seedling!

And here are my butterfly bush seedlings in their new home (May 2012).

Butterfly bush seedling closeup!

Unfortunately, my brain plants were sprayed by the sprinklers not long after I got settled in with my parents again. The brain plants were only supposed to be watered with warm water and with the cold cold water from the sprinklers, they withered and died. Poor things never got much bigger than the seedlings seen above. :( 

But my butterfly bushes did really well, even though I put them outside at a pretty early age. Here's what they looked like October 1, 2012!


I checked on the butterfly bush this spring and the leaves are coming back strong; looks like my mom's got a healthy butterfly bush to tame! 

I just wanted to give you guys a quick update on those. I'm planning on trying the brain plants again someday. I kept the microterrariums and the extra seeds; we'll see what I can do with that!

I hope that you're starting to enjoy some spring weather in your neck of the woods, wherever you are! 

Until next time, stay excellent!

- Jenny -

Monday, April 8, 2013

Making the Difference: Cowboys vs. Crohn's

Hello, friends!

You know those inspiring stories of people just like you and me doing big things to make a change? Well, I am lucky enough to know someone doing just that. I consider Nick a friend, even though it's been years since we've last talked. I think the bond of the Class of 2008 from Tri-Cities Prep will never truly be broken in any of us. I feel it there even though it's been nearly 5 years, and I feel it for all of my former classmates. Don't Stop Believin'!

In fact! Anna is also from the TCPrep class of 2008, as are Alivia from Food Adventures with Alivia! and my friend Andy, for whom I woodburned some drumsticks!

Anyway -- back to the inspiring story.

Cowboys vs. Crohn's

My friend Nick and his cousin are going on an old fashioned adventure, to "raise money and awareness for the battle against Crohn’s disease and to bring hope to Crohn’s patients, children and adults alike." They will be embarking on a 3.5 month, 1,300 mile horseback ride from Gardiner, MT to Bellingham, WA in order to achieve these goals.

Talk about awesome, inspiring, and daring!

This is the kind of thing you read about and dream about and they are setting out to do it, in reality. They're going to ride through the Northwest and experience it and the incredible people along the way. They are hoping to raise $100,000 for the Crohn’s and Colitis Foundation of America. Want to learn more about their plans, the route, their stories, and how to support?! Well, I've got all the links below!

https://www.facebook.com/cowboysvscrohns

I don't know about you, but when I hear about these great things, it makes me want to do something, too. However, I know that I don't have the skills for such an adventure into the wild of my own, but I want to help them with theirs.

If this is how you feel, then join me & help!

Here is their indiegogo campaign to raise money for the trip. 
You can even score sweet swag for donating! 
(There's more swag than the tee available, check out the campaign to see!)

Every little bit helps - even if all you can give is a dollar. Anyone can make a difference. By helping these guys make their difference, you too make a difference!

Follow their story as it develops and learn more about Crohn's:


And if you're feeling like you want to do even more - the biggest help/support you can do is spread the word. 

If we all got behind one another whenever we had an endeavor we truly cared about, doing good for others - think of how much we could all accomplish. 

Spread the love. 

Stay excellent!

- Jenny -

Sunday, March 31, 2013

One Month Photo Challenge

Hello, friends!

I have something fun for anyone to try!

Some of you may have seen photo challenges like "31 Days on Film" or "'This Month' Photo Challenge." I know I've seen them on Pinterest and I've watched as Facebook friends participated in series of them. I like the idea, but I wanted mine to be less a chronicle of my everyday life and more a schedule to practice photography. You know, a reason to go out and take a photo every day and get some practice. As any professional and hobbyist photographer (I am the latter, for sure) will tell you, the best thing you can do for your photography is to practice. 

I found a March photo challenge via Pinterest. It had some flaws, for example it was missing a day... So I decided to make my own! Haha!

I have created an easy to follow calendar, below, that can be performed any month. It has 31 days of photo prompts, but you can do 30 if the month is a short one. When I did my challenge, I tried my best to accomplish one a day, but some days I just couldn't fit it in or the photo I took that day was not up to my standards. And then there were days that were great; I had great lighting and I was feeling inspired! The point of the challenge is to give you a reason to practice, so if some days you don't get to it and other days you are crazy prolific - that's great! Just try to get all 30 or 31 items taken care of before the end of the month!

Also, this is your practice, so you don't have to do them in order. You can print out the calendar (.pdf here!) and cross them out as you accomplish them. :) It's flexible, easy, and fun!

So April starts tomorrow!! Get shooting!


Below are some of my favorite shots from my March 2013 Photog Challenge!

Happy Easter, my friends.
Stay excellent!

- Jenny -

Animal Portrait - "Amber"
Abstract - "Death"
Flora - "Awakening"
Something Huge - "La Luna"
Low Angle - "With Persona"
A note about the last picture. "Persona" is the name of this wind vane. It's a kinetic sculpture found on the Washington State University Pullman campus, atop the libraries, that sings when the wind moves it. Learn more about its dedication here and here is a recording of its singing. Awesome, right?

Sunday, March 24, 2013

Food Adventures: Pumpkin Chocolate Swirl Cheesecake

Hello, friends!

Guess what, guys! I made a cheesecake! :D

Mr. Kyle requested a cheesecake for his sweet this weekend. His one detail in the request was that it have pumpkin in it. So I went to the interwebs for a pumpkin cheesecake recipe. I found this one by Paula Deen (so you know it's good), but I decided that I didn't want to follow the recipe all that closely. I wanted to live dangerously. ;) And I wanted to get some chocolate in there, because pumpkin and chocolate are a beautiful couple.

I practically didn't follow this recipe at all... except for the the crust, which was a great crust recipe.

So here's my cheesecake recipe!

Pumpkin Chocolate Swirl Cheesecake


Ingredients

For Crust:
  • 1 3/4 cups graham cracker crumbs
  • 3 tablespoons light brown sugar
  • 1/2 teaspoon ground cinnamon
  • 1 stick melted salted butter
For Filling:
  • 1 cup milk chocolate chips
  • 1 cup semi-sweet chocolate chips
  • 3 (8-ounce) packages of cream cheese or Neufchâtel cheese (1/3 less fat), room temperature
  • 3 eggs plus 1 egg yolk
  • 1/4 cup sour cream (or light sour cream)
  • 1 1/2 cups sugar
  • 2 tablespoons all-purpose flour
  • 1 teaspoon vanilla extract
  • 1 (15-ounce) can of pureed pumpkin
  • 1 teaspoon pumpkin pie spice\

Directions
  1. Preheat oven to 350 degrees F. 
  2. Follow the "For crust" instructions from this recipe
  3. Get two double boilers (or two small pans of water with glass bowls that fit over them to work as double boilers) ready to melt chocolate. 
  4. Place 1 cup of milk chocolate chips in one double boiler to melt and place 1 cup of semi-sweet chocolate chips to melt in the other double boiler. 
  5. Melt the chocolate and let cool slightly, so it is not hot, but not to the point where it begins to harden. 
  6. While the chocolate melts, beat cream cheese until smooth. 
  7. Add eggs, egg yolk, sour cream, sugar, flour, and vanilla. 
  8. Beat until well combined. 
  9. Scoop two cups of cream cheese mixture out of the "mother" mixture and divide into two small bowls, one cup of cream cheese mixture into each bowl. 
  10. Mix the melted and cooled milk chocolate chips into the cream cheese mixture in one of the two small bowls that contains one cup of cream cheese mixture, until well mixed. 
  11. Repeat with the semi-sweet chocolate and remaining small bowl of cream cheese mixture. 
  12. Beat 2/3 of the can of pumpkin puree and the pumpkin pie spice into the remaining cream cheese mixture (the mother mixture).
  13. Pour half of the pumpkin cream cheese mixture into the prepared crust and spread evenly. 
  14. Dollop the milk chocolate cream cheese mixture into the pumpkin mixture in the crust, making spots in the pumpkin mix like you would see on dice. Use a knife to swirl the chocolate mix around. 
  15. Pour the remaining half of the pumpkin cream cheese mixture into the crust, spread evenly. 
  16. Dollop the semi-sweet chocolate mixture into the pumpkin mixture just as was done with the milk chocolate mixture. Use a knife to swirl the chocolate mix around. 
  17. Place in the oven and bake for 1 hour. 
  18. Remove from oven and let sit for 15 minutes. 
  19. Cover with plastic wrap and refrigerate for 4 hours or overnight. 
There you have it!!


I made mine with the lighter version of the ingredients, just to save some calories and fat. It was delicious! The pumpkin and chocolate are SO GOOD. I hope you enjoy it! I know we did!

Until next time, friends!
Stay excellent!

- Jenny -

Saturday, March 16, 2013

DIY: Wood Burned Drumsticks

Hello, friends!

I am back with another wood burning post. As you may have read from my previous posts about the wood burned storage box and my calendar journal, I really enjoy pyrography. I've only been dabbling in it for about a year and a half. There's still a lot to learn and practice! For example, I have yet to try to transfer my drawing skills (like shading, crosshatch, etc.) to wood burning like some have done to create beautiful artwork. That is on the to do list, though. I'm thinking that this coming year of life, I'll take a stab at burning a plaque in place of drawing with graphite, you know what I mean? I think that will be quite the adventure! :)

Anyway!

For a best friend's birthday, I decided to do a wood burn project. I have found that these projects really go over well. They're unique and often have a practical use - like the storage boxes. This friend of mine plays the drums and, in my opinion, is really great at it. I've seen him play just for kicks as well as on stage and it's quite a thrill to watch. I'm not sure if I've ever told him so, but I admire his talent quite a bit. Heh, maybe he'll stumble on this post one day. :) I decided to wood burn a pair of drumsticks for him - I know that drumming is one of his passions and thought that this would be a great gift.


You'll have to forgive the picture quality - I worked on these during the evenings after work, so natural lighting was not available and I was in a bit of a hurry, hence my cluttered desk in the background. :P

Above is a photo of the drumsticks as they were when I bought them, save for the pencil line.
I wanted to keep the design simple. The thought of doing a collage of graffiti-esque images all over crossed my mind, but as I mentioned before, I have not honed my wood burning skills and that would have been quite the undertaking. O.o

So clean and simple it was!
Below are some shots after I was finished.


And a bow to top it off!

I was pleasantly surprised to find that the drumsticks took really well to wood burning. I was afraid that they wouldn't take the color well. I decided to leave the drumsticks raw, without any stain or lacquer. One of my favorite things about picking up a pair of drumsticks is the feel of the bare wood grain; my favorite thing about picking up a pair of used drumsticks (before they are broken) is the feel of the wear - It's like you can feel the beat and rhythm in them. Maybe that's just me though... I am a little mad, not quite as mad as a hatter... but still. ;) 

For those interested, I used a mini flow point for the outlining, the name, and my initials on the end of the sticks. I used a shading point for the solid fill on the ends and for the triangle pattern. 

Until next time! 

Stay excellent!

- Jenny - 

Saturday, March 9, 2013

Hakuna Matata

As you might have guessed from my To Infinity & Beyond post, I am a Disney kid. I love me some Disney. My favorite movie of all time (not just favorite Disney movie) is The Lion King. It is closely followed by another Disney movie, The Nightmare before Christmas. I can't get enough of them.

I have been to Disneyland twice and Disney World is on the life to-do list.

Not only do I love the movies and the amusement parks, I love the lessons and attitude of Walt Disney and those that were instilled in the classic movies. It's truly inspired.

I stumbled upon a Hakuna Matata ring on Etsy. I pre-ordered because it was so reasonably priced. I received it this week! Look!


Adorable, right?

Ever since I fell in love with The Lion King, I have made hakuna matata one of my life mottos. I adore this ring and the seller was gracious enough to indulge my indecisive nature and give me both the infinity symbol and the heart. The ring usually only comes with one symbol on the inside of the band. It was a great Etsy experience. :)

Here are some other Disney items that I have been gawking at on Etsy:


  1. 8 X 10" Walt Disney and Pixar posters set
  2. Disney pillow
  3. The Lion King minimalist poster
  4. Disney Pixar Up Themed greeting card
And of course, in keeping with my last Etsy post, here are some great Disney inspired tattoos. I don't know if I'd ever seriously consider a Nightmare before Christmas tattoo, but I have considered the "Remember who you are" tattoo. :) 

(link)

(link)


From Winnie the Pooh and Snow White to WALL-E and Mulan, I love Disney. 
Hope you are doing well, wherever you are! 

Stay excellent! 
- Jenny -