Showing posts with label home decor. Show all posts

Saturday, March 9, 2013

Hakuna Matata

As you might have guessed from my To Infinity & Beyond post, I am a Disney kid. I love me some Disney. My favorite movie of all time (not just favorite Disney movie) is The Lion King. It is closely followed by another Disney movie, The Nightmare before Christmas. I can't get enough of them.

I have been to Disneyland twice and Disney World is on the life to-do list.

Not only do I love the movies and the amusement parks, I love the lessons and attitude of Walt Disney and those that were instilled in the classic movies. It's truly inspired.

I stumbled upon a Hakuna Matata ring on Etsy. I pre-ordered because it was so reasonably priced. I received it this week! Look!


Adorable, right?

Ever since I fell in love with The Lion King, I have made hakuna matata one of my life mottos. I adore this ring and the seller was gracious enough to indulge my indecisive nature and give me both the infinity symbol and the heart. The ring usually only comes with one symbol on the inside of the band. It was a great Etsy experience. :)

Here are some other Disney items that I have been gawking at on Etsy:


  1. 8 X 10" Walt Disney and Pixar posters set
  2. Disney pillow
  3. The Lion King minimalist poster
  4. Disney Pixar Up Themed greeting card
And of course, in keeping with my last Etsy post, here are some great Disney inspired tattoos. I don't know if I'd ever seriously consider a Nightmare before Christmas tattoo, but I have considered the "Remember who you are" tattoo. :) 

(link)

(link)


From Winnie the Pooh and Snow White to WALL-E and Mulan, I love Disney. 
Hope you are doing well, wherever you are! 

Stay excellent! 
- Jenny -

Wednesday, January 16, 2013

Update: Succulents

Hey-hey!

Do you remember that succulents terrarium that I posted about last year?
Well, it's changed some since then.

Here's what my succulents look like now:


I know it's probably hard to tell, but they got a lot bigger! I'm to blame for this growth, haha. I watered them quite a bit and they did get plant food in their soil, since as a college student in an apartment complex, there wasn't a whole lot of rocks and dirt around. So I used stones and potting soil from the store. I also got them a new pot to give them a little more room. And you may have noticed, I'm missing one of them - the tall one. I decided that three was too many to cram into a pot (with the rate at which mine were growing), so the tall one got the cut. 


I still have the lantern too, and I love it! I love my succulents too - I think they are happier in this adorable pot that I got at a local craft store, on sale. :) And the little drip saucer I actually picked up after the fact at Fred Meyer thinking the purple would be close to the purple in the pot - turns out it's a perfect match! Destiny!

For Christmas, I decorated them with little pom-poms. Adorable! Heehee. They're cute little friends. I enjoy having them around. 


Another fun little plant friend I have is my porchulaca. 
Fun story about it: I actually found it growing in the gravel that I park in, when I am home. I straddled it every time I parked and didn't even know, until one day I noticed a bright red flower...


It was gorgeous! 
I left it there for a few days, being careful not to run it over, now that I knew it was there. 

After a few days, I couldn't take it anymore - I had to get it in a pot to keep! 

So I went back to Fred Meyer and picked up a small, cute, green pot and saucer. Then I went home, lined the bottom with a circle cut from a coffee filter, then some of the gravel from outside, followed by some of that sandy dirt we have in my neck of the woods (semi-arid desert!). Then I gently dug out the porchulaca and placed it in the freshly dug up soil in my pot. Once securely set, I covered the exposed soil with gravel from right where I took the plant. Thought it would feel more at home that way. ;) 

I watered it a little after the transplant, to help it cope with the stress. 

A friend of mine was actually the one that told me what it was. He said it looked a lot like some porchulaca he had in a garden box. I think it looks like it too! I guess I don't know for sure, but it makes sense to me! 

He's a great little guy - they barely need any care. Sparse water and as much sunlight as they can get, being a desert-y plant. But it seems to be doing alright in the sparse sunlight of wintertime, too. 

I love the little guy.

And he's doing well!  


So my porchulaca and succulents sit in my window soaking up what little sun the winter skies have to offer. They seem to be coping pretty well, even with the chill from the glass. :) 

My little green friends. I like plants. :) 

Do you have any lovable and loving pet plants??

Stay excellent!
- Jenny - 

Friday, October 12, 2012

Falling for Autumn: Decor & Food Adventures!

Hello, friends!

Man, it feels like only yesterday I was telling you about how much I love July, but here we are! It's nearly the middle of October!!

Something that you'll learn about me is that I don't really have a favorite season.
My favorite thing about the seasons is when the change. I love each season for a different reason and I am always excited about the next one. By the time we have gone through a season and the next one is about to come around, I'm super pumped for it.

So here, I am going to talk about my deep love affair with fall. <3

There's soooo much to love about autumn. The beautiful scenery, the chilly nights and crisp air, the pumpkin everything, Halloween, Thanksgiving, family time, the renewal of the appreciation for warmth... all of it!

In celebration of arguably my favorite holiday (I have a hard time picking a favorite holiday too --- don't judge me!), my boyfriend Kyle and I decorated his apartment! Being fresh out of college paired with a college student, we needed to do our decorating on a budget. Here's how we did! :D

Copyright(c)JennyK.
This cute little ghosty is a tea light candle holder. Found at Wal-mart (he was the last one!) for $3. Awesome. 
Copyright(c)JennyK.
Copyright(c)JennyK.
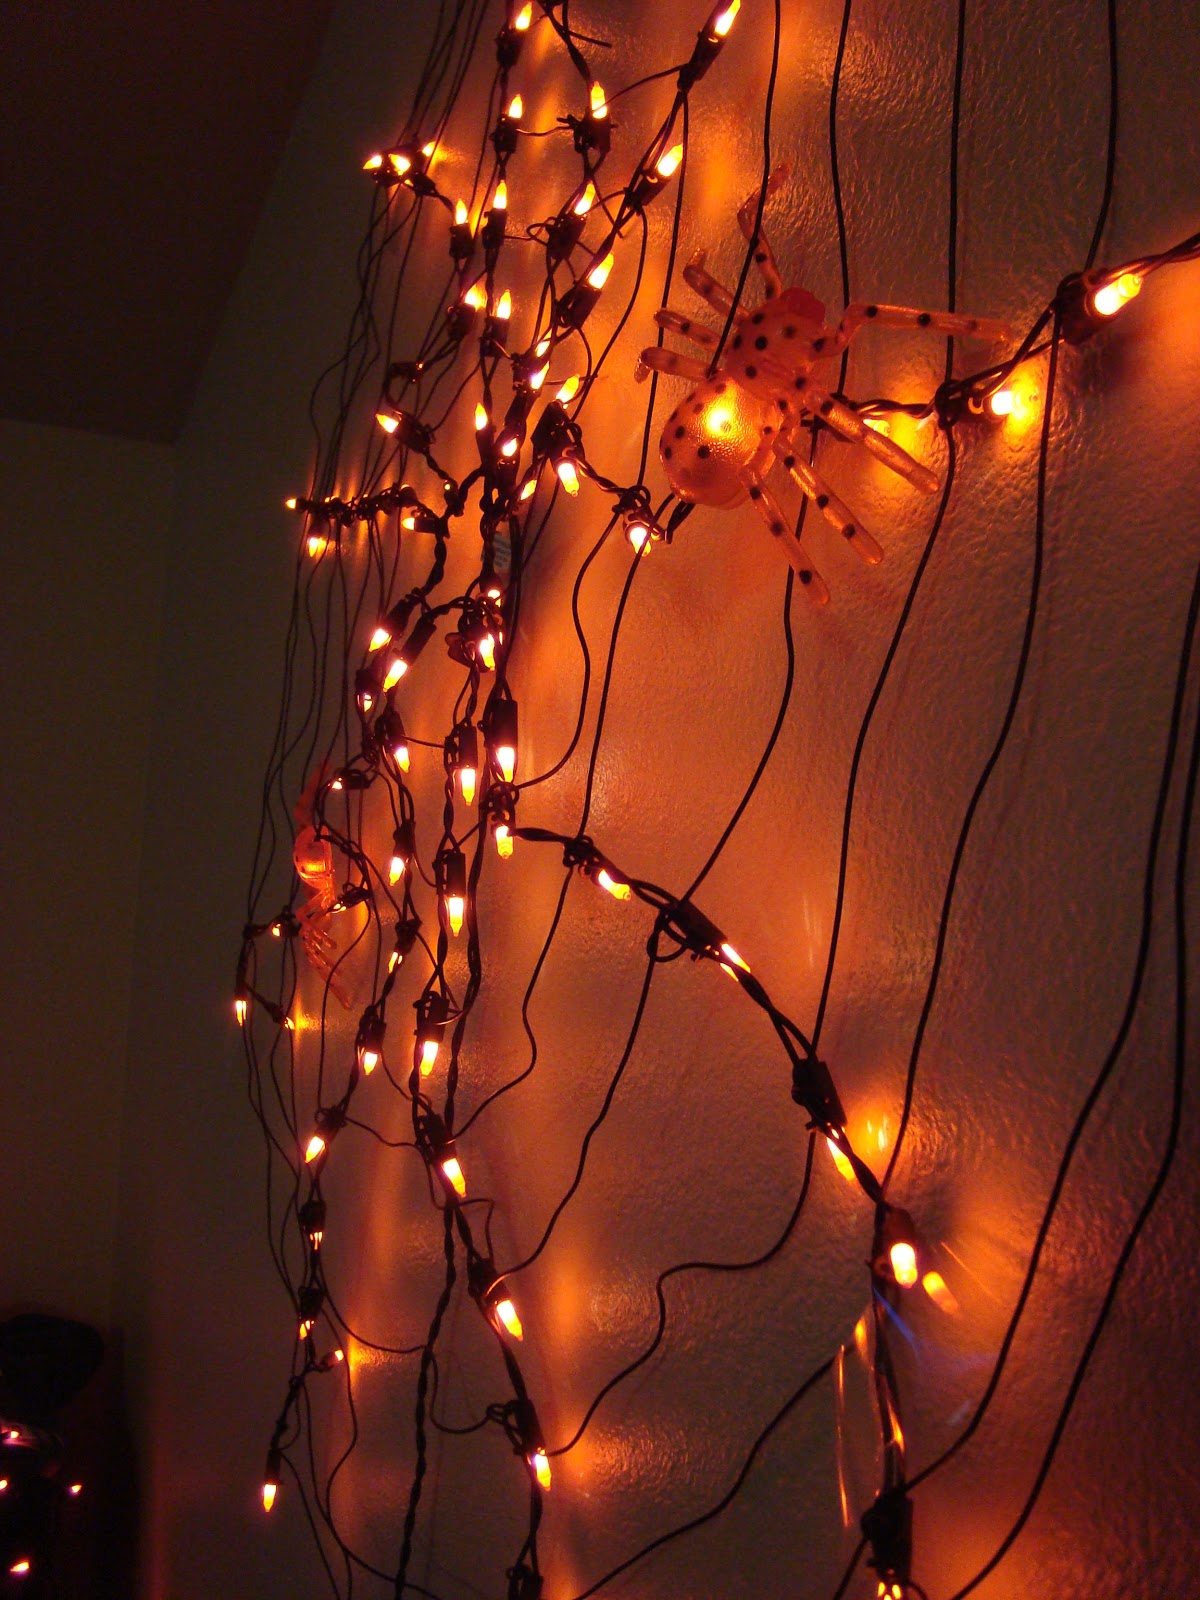
Lighted spider web - $7.97 (plus tax) Wal-mart. 
Copyright(c)JennyK.
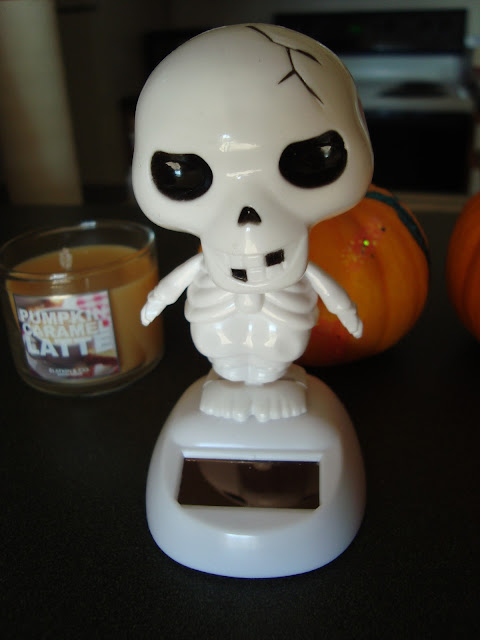
This little guy is a solar powered dancing skeleton. Place he was found: The Dollar Tree. Awesome right???

I also bought some window clings for my room at home (away from Kyle's apartment, I live at home while he's at school, because I have to work... *sigh* adulthood.. ;) ) These were all on one sheet for about 2 bucks. 
Copyright(c)JennyK.

Copyright(c)JennyK.

Copyright(c)JennyK.

Another thing about autumn I love is the food. Thanksgiving is the shit. But aside from delicious mashed potatoes, turkey, ham, rolls, green bean casserole, and pumpkin pie, there's the baking and homemade candy to love!! Now, I've been an avid baker since I was able to safely operate an oven. I've never tried my hand at candy making but decided that this year I'd give it a shot!! 

I decided to try to make these Earl Grey tea infused chocolate truffles and these pumpkin spice caramels. Overall, the endeavor was a success! 

The chocolate truffles were easy to make and turned out deliciously! The only difficulty that I came across was shaping the truffles. I don't have a melon baller and didn't really want to shell out the money for one that I may not need all that often. So I used a spoon and my hands. Haha. It went pretty well. The sizes were a little inconsistent and not all of them were convincingly round - but they were tasty all the same! Also, the cocoa coating was a bit thick on some, but I think I'd get more finesse with more practice. ;) I also had two different kinds of powdered cocoa - true dark and regular, hence the different shades below. 

Copyright(c)JennyK.

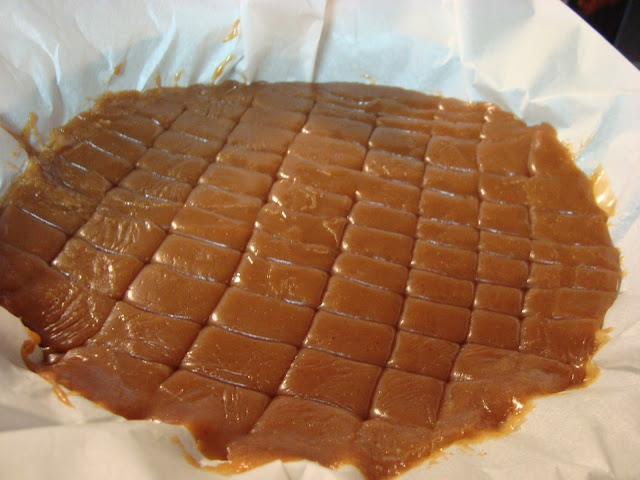
The caramels were more difficult. This was my first experience trying to make what I call "real" candy. This is the kind of candy that takes technique and precision with cook times and temperatures to get the right consistency. My first batch of caramels didn't cook long enough after the cream addition so it was very soft, almost like the caramel topping for ice cream (which is what Kyle used it for later since it was still really tasty!). I decided to try one more batch. This one turned out more evenly mixed and closer to the right consistency but I still missed the mark by a few minutes/degrees. They were still quite soft, too soft to be wrapped up like candies. But we're still gonna be eating my caramel because, though they aren't the caramel chew candies I was aiming for, the flavor is all there! I'm not deterred at all from candy making - I know it takes practice and it's a difficult culinary art. I'll keep you posted on my endeavors in the candy making field! :D

Copyright(c)JennyK.
This is right as the sugar mix was coming to a boil.
Copyright(c)JennyK.
This is during the boil down with the cream mixture added. 
Copyright(c)JennyK.
This is a picture of my second batch after it cooled. (I didn't have a 8" square pan, haha)
Do you like fall or do you hate that summer is over 'til next year? How do you  celebrate or prepare for fall and the onset of winter?

Anyway, those are my fall adventures thus far! I will probably be posting again about others - looking like I might go to a haunt in town with my cousin and I'll probably post about Thanksgiving food, because, well, I love Thanksgiving food. 

Until then, stay excellent! 
- Jenny -

Sunday, March 25, 2012

Springtime Fun - Microterrariums

Spring finally made an appearance here, today! It was literally snowing every weekday this past week, but today is sunny and lower fifties! It's gorgeous and full of happiness. Every spring, I always get hit with the gardening bug. Granted I don't have the best gardening track record, I have been better at it these past few years. Last summer, I grew a big sunflower, a bunch of morning glories, and snapdragons. They all thrived and were so much fun!

On Friday this week, I was browsing through Michael's on a trip for mortarboard decorating supplies (hooray graduation!) and I stumbled upon these cute microterrariums:


There were all sorts of plants in the bin (in the kids' stuff section). I had to stop myself from buying these two and the pine tree, the cactus assortment, the herbs assortment, and the mint plant. That would be too many, I think. But aren't they awesome!? 

So on this sunny day in Pullman, I spent my early afternoon applying the second and final coat of poly on that box that I've shown you and getting these little terrariums on their way to having little sprouts! :) 

Soil disk + ~2 Tbs of water
The soil disk grows!
The seeds! Left: butterfly bush (Buddleia davidii) seeds. Right: Brain plant (Celosia amigo) seeds.
Left: The brain plant seeds in the soil. Right: My microterrariums (complete with labels)!
Hope the sun is shining where you are! 
Have some fun in the sun and get your spring projects rolling. 
Have a great week. 

- Jenny - 

04.26.2013: 
Hey all! I have finally written an update on these plants. If you're interested in seeing how they turned out, check out the Update: Microterrariums post. :)

Friday, March 16, 2012

DIY: Succulents Lantern Terrarium

There are many exciting new developments going on in my creative life & it's really exciting! I'm finishing up the woodburning project, and I have just made myself a succulents arrangement!

I don't know if you've seen it around the web lately, but there has been a boom in the interest in succulents and terrariums. I personally am glad for it; I love these cute plants and adore having plants in my life. They add a little life to your everyday decor - They make me smile! That's a good enough reason to have 'em around, right??

Anyway! Inspired by these little plants, I made myself a succulents lantern! Here's how I did it - It's quick, easy, and awesome. Enjoy!
- Jenny -

01.16.2013:
Hello, friends!
My succulents have changed quite a bit since this post about the lantern terrarium! I have moved them from the lantern and they're doing great! Check them out in the Update: Succulents post!
---------------------------------------------------------------------

First, what you'll need:
  • A container for your plants. I used a small glass cylinder that I found at Walmart (affordable!)
  • A lantern in which the container can fit (only needed if you want to keep them in a lantern, haha). I got mine at Hobby Lobby with Anna!
  • A few small succulents. I used three 2" plants. 
  • Rocks/pebbles
  • Cactus mix potting soil
  • Floral moss
For more information regarding succulent soil and all other matters on succulents, this is a great resource.

Here are pictures of my supplies:


Steps:
1. Put some rocks or pebbles in the bottom of the container. I made a layer about an inch thick. This will allow the water in the soil to drain, which is important for your plants' health.


2. Add a layer of potting soil on top of the rocks, pressing on the soil to pack it a bit - not too firmly, just so it's not really loose.
3. Next, arrange your plants in the container like you would any other plant into a pot. Be sure to supplement more soil where needed to secure them in the container. 
4. Water the plants and be sure to watch an see if the soil moves when it is watered. Be sure not to over-water as well. Remember, succulents are water-retaining plants and are adapted to living with less water than most plants. 

Here's what my arrangement looked like at this point: 


5. Next, cover exposed soil with pieces of the floral moss. This is optional, really. I just think it gives it a nice finished look. 

6. And finally, to make this a "Succulent Lantern," insert your arrangement into your lantern! Of course, the arrangement would look great on its own, especially if you have a particularly beautiful container/planter. I have seen gorgeous arrangements in milk glass (the milky white looks stunning with the greens of the plants). But, I was smitten with this lantern and the idea of having a little lantern terrarium! 

Here it is all finished!