Showing posts with label pumpkin. Show all posts

Sunday, March 24, 2013

Food Adventures: Pumpkin Chocolate Swirl Cheesecake

Hello, friends!

Guess what, guys! I made a cheesecake! :D

Mr. Kyle requested a cheesecake for his sweet this weekend. His one detail in the request was that it have pumpkin in it. So I went to the interwebs for a pumpkin cheesecake recipe. I found this one by Paula Deen (so you know it's good), but I decided that I didn't want to follow the recipe all that closely. I wanted to live dangerously. ;) And I wanted to get some chocolate in there, because pumpkin and chocolate are a beautiful couple.

I practically didn't follow this recipe at all... except for the the crust, which was a great crust recipe.

So here's my cheesecake recipe!

Pumpkin Chocolate Swirl Cheesecake


Ingredients

For Crust:
  • 1 3/4 cups graham cracker crumbs
  • 3 tablespoons light brown sugar
  • 1/2 teaspoon ground cinnamon
  • 1 stick melted salted butter
For Filling:
  • 1 cup milk chocolate chips
  • 1 cup semi-sweet chocolate chips
  • 3 (8-ounce) packages of cream cheese or Neufchâtel cheese (1/3 less fat), room temperature
  • 3 eggs plus 1 egg yolk
  • 1/4 cup sour cream (or light sour cream)
  • 1 1/2 cups sugar
  • 2 tablespoons all-purpose flour
  • 1 teaspoon vanilla extract
  • 1 (15-ounce) can of pureed pumpkin
  • 1 teaspoon pumpkin pie spice\

Directions
  1. Preheat oven to 350 degrees F. 
  2. Follow the "For crust" instructions from this recipe. 
  3. Get two double boilers (or two small pans of water with glass bowls that fit over them to work as double boilers) ready to melt chocolate. 
  4. Place 1 cup of milk chocolate chips in one double boiler to melt and place 1 cup of semi-sweet chocolate chips to melt in the other double boiler. 
  5. Melt the chocolate and let cool slightly, so it is not hot, but not to the point where it begins to harden. 
  6. While the chocolate melts, beat cream cheese until smooth. 
  7. Add eggs, egg yolk, sour cream, sugar, flour, and vanilla. 
  8. Beat until well combined. 
  9. Scoop two cups of cream cheese mixture out of the "mother" mixture and divide into two small bowls, one cup of cream cheese mixture into each bowl. 
  10. Mix the melted and cooled milk chocolate chips into the cream cheese mixture in one of the two small bowls that contains one cup of cream cheese mixture, until well mixed. 
  11. Repeat with the semi-sweet chocolate and remaining small bowl of cream cheese mixture. 
  12. Beat 2/3 of the can of pumpkin puree and the pumpkin pie spice into the remaining cream cheese mixture (the mother mixture).
  13. Pour half of the pumpkin cream cheese mixture into the prepared crust and spread evenly. 
  14. Dollop the milk chocolate cream cheese mixture into the pumpkin mixture in the crust, making spots in the pumpkin mix like you would see on dice. Use a knife to swirl the chocolate mix around. 
  15. Pour the remaining half of the pumpkin cream cheese mixture into the crust, spread evenly. 
  16. Dollop the semi-sweet chocolate mixture into the pumpkin mixture just as was done with the milk chocolate mixture. Use a knife to swirl the chocolate mix around. 
  17. Place in the oven and bake for 1 hour. 
  18. Remove from oven and let sit for 15 minutes. 
  19. Cover with plastic wrap and refrigerate for 4 hours or overnight. 
There you have it!!


I made mine with the lighter version of the ingredients, just to save some calories and fat. It was delicious! The pumpkin and chocolate are SO GOOD. I hope you enjoy it! I know we did!

Until next time, friends!
Stay excellent!

- Jenny -

Tuesday, November 6, 2012

A Lil More Halloween - Local Haunts

Hello, friends!

I know that it is past Halloween and that Thanksgiving is just around the corner, but I thought I'd post once more about Halloween. It is tied as favorite holiday (I have a really hard time picking favorite times of the year, if you couldn't tell with seasons. The same difficulty is there with holidays... Don't judge me!).

This season I was able to make it to two local(ish) haunts. I think that local haunts and community events are the perfect thing to do for the Halloween holiday. They are so wonderfully creative and are often built on the ideas and hard work of community members, making them all the more special.

In the metropolis that is the Tri-Cities, WA (Kennewick, Richland, Pasco), we had a good handful of little haunts going on. I unfortunately was only able to make it to one due to work and my weekends away, visiting the man. ;)

One that I wanted to visit was the Haunted Forest in Sacajawea State Park. Maybe I'll get the chance next year! The local haunt I did get a chance to visit was Terror behind the Screen.


This attraction is based on scenes from well known horror flicks like Dawn of the Dead and Hostel. The square-footage seems small but they packed a lot in there. The actors are very convincing and the anxiety factor goes wayyy up right out of the gate with the entry through a tight canal through which you need to squeeze to enter the attraction. It was very claustrophobic and disorienting! The actors get really close to you and are very interactive and free. In other attractions, I have found that the actors often stay within their "area" but some of these actors seemed to go beyond the expected boundaries, creeping after you to frighten you again. 

Other than that attraction, I also attended Scarywood (presented by Silverwood) for my second year. Silverwood theme park is an awesome place during the regular season, but I have to say Scarywood is pretty damn awesome too! They have multiple haunted houses/walk-throughs and their train ride is tricked out for the Halloween season. Not to mention the roller coasters still run and that all merchandise is 50% off, including the Scarywood stuff! Timber Terror runs with the cars on backwards for the event! My cousin Megs and I didn't get a chance to go before Halloween itself, but they were open the weekend following so we went this past Saturday.


The train ride is the Zombiewood Express, a zombie hunting train ride for 17+ years of age. Hilarious scripting, fairly amusing sights, loud gunfights, foul language, drug references, and a little bit of sex and Southpark - What's not to LOVE?


Throughout the park, while you're traveling between attractions you will be ambushed by all sorts of creatures, such as this beauty. There were also scarecrows, werewolves, and porcelain faced doll-people. Always keeping you on your toes!


This was an attraction that I didn't see last year, a 3D haunted house, 3Dementia. It was very psychedelic and neon - I loved it! And the rooms of doors at the end had my heart racing!


There's A LOT more than just these things at Scarywood, I hope they make enough profit to justify continuing with it. It's great! It is definitely worth a drive out there to have a night of scares, food, and cheap merch!

Happy Halloween, friends - off toward Thanksgiving and Christmas!!

Love to all.

Stay excellent!
- Jenny -

Friday, October 12, 2012

Falling for Autumn: Decor & Food Adventures!

Hello, friends!

Man, it feels like only yesterday I was telling you about how much I love July, but here we are! It's nearly the middle of October!!

Something that you'll learn about me is that I don't really have a favorite season.
My favorite thing about the seasons is when the change. I love each season for a different reason and I am always excited about the next one. By the time we have gone through a season and the next one is about to come around, I'm super pumped for it.

So here, I am going to talk about my deep love affair with fall. <3

There's soooo much to love about autumn. The beautiful scenery, the chilly nights and crisp air, the pumpkin everything, Halloween, Thanksgiving, family time, the renewal of the appreciation for warmth... all of it!

In celebration of arguably my favorite holiday (I have a hard time picking a favorite holiday too --- don't judge me!), my boyfriend Kyle and I decorated his apartment! Being fresh out of college paired with a college student, we needed to do our decorating on a budget. Here's how we did! :D

Copyright(c)JennyK.
This cute little ghosty is a tea light candle holder. Found at Wal-mart (he was the last one!) for $3. Awesome. 
Copyright(c)JennyK.
Copyright(c)JennyK.
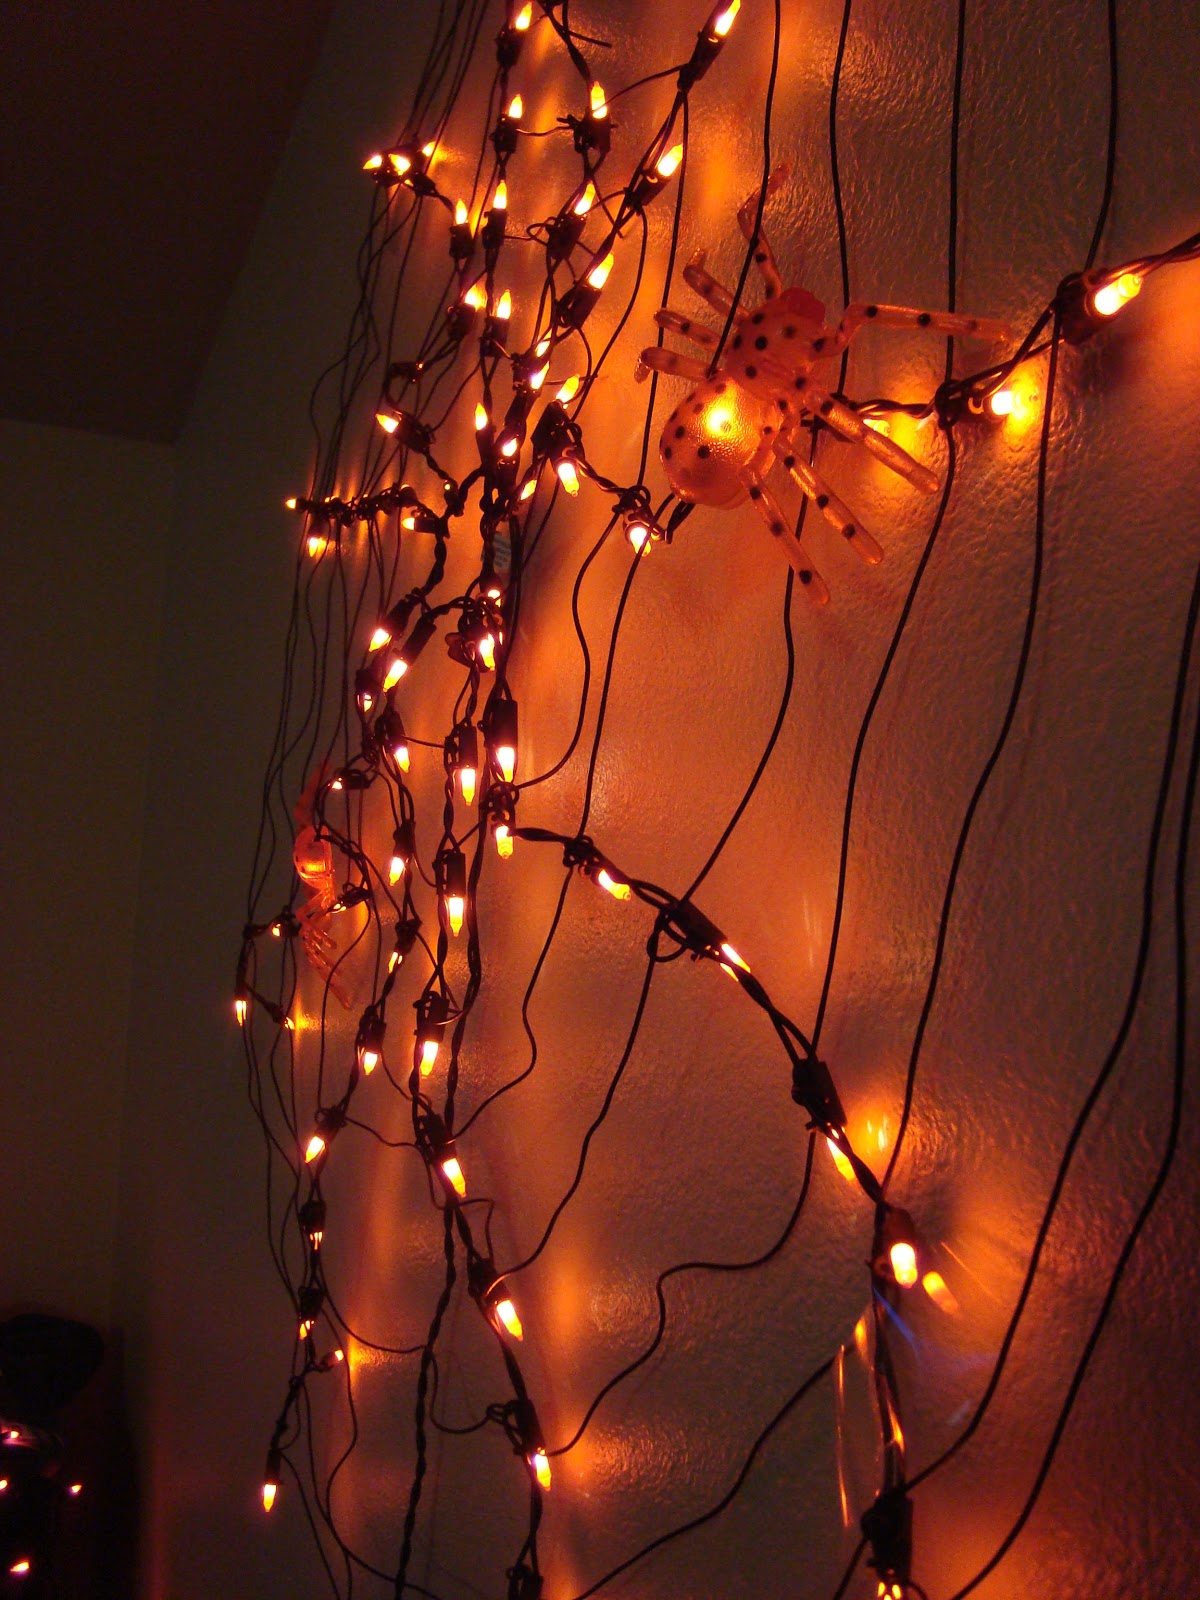
Lighted spider web - $7.97 (plus tax) Wal-mart. 
Copyright(c)JennyK.
This little guy is a solar powered dancing skeleton. Place he was found: The Dollar Tree. Awesome right???

I also bought some window clings for my room at home (away from Kyle's apartment, I live at home while he's at school, because I have to work... *sigh* adulthood.. ;) ) These were all on one sheet for about 2 bucks. 
Copyright(c)JennyK.

Copyright(c)JennyK.

Copyright(c)JennyK.

Another thing about autumn I love is the food. Thanksgiving is the shit. But aside from delicious mashed potatoes, turkey, ham, rolls, green bean casserole, and pumpkin pie, there's the baking and homemade candy to love!! Now, I've been an avid baker since I was able to safely operate an oven. I've never tried my hand at candy making but decided that this year I'd give it a shot!! 

I decided to try to make these Earl Grey tea infused chocolate truffles and these pumpkin spice caramels. Overall, the endeavor was a success! 

The chocolate truffles were easy to make and turned out deliciously! The only difficulty that I came across was shaping the truffles. I don't have a melon baller and didn't really want to shell out the money for one that I may not need all that often. So I used a spoon and my hands. Haha. It went pretty well. The sizes were a little inconsistent and not all of them were convincingly round - but they were tasty all the same! Also, the cocoa coating was a bit thick on some, but I think I'd get more finesse with more practice. ;) I also had two different kinds of powdered cocoa - true dark and regular, hence the different shades below. 

Copyright(c)JennyK.

The caramels were more difficult. This was my first experience trying to make what I call "real" candy. This is the kind of candy that takes technique and precision with cook times and temperatures to get the right consistency. My first batch of caramels didn't cook long enough after the cream addition so it was very soft, almost like the caramel topping for ice cream (which is what Kyle used it for later since it was still really tasty!). I decided to try one more batch. This one turned out more evenly mixed and closer to the right consistency but I still missed the mark by a few minutes/degrees. They were still quite soft, too soft to be wrapped up like candies. But we're still gonna be eating my caramel because, though they aren't the caramel chew candies I was aiming for, the flavor is all there! I'm not deterred at all from candy making - I know it takes practice and it's a difficult culinary art. I'll keep you posted on my endeavors in the candy making field! :D

Copyright(c)JennyK.
This is right as the sugar mix was coming to a boil.
Copyright(c)JennyK.
This is during the boil down with the cream mixture added. 
Copyright(c)JennyK.
This is a picture of my second batch after it cooled. (I didn't have a 8" square pan, haha)
Do you like fall or do you hate that summer is over 'til next year? How do you  celebrate or prepare for fall and the onset of winter?

Anyway, those are my fall adventures thus far! I will probably be posting again about others - looking like I might go to a haunt in town with my cousin and I'll probably post about Thanksgiving food, because, well, I love Thanksgiving food. 

Until then, stay excellent! 
- Jenny -